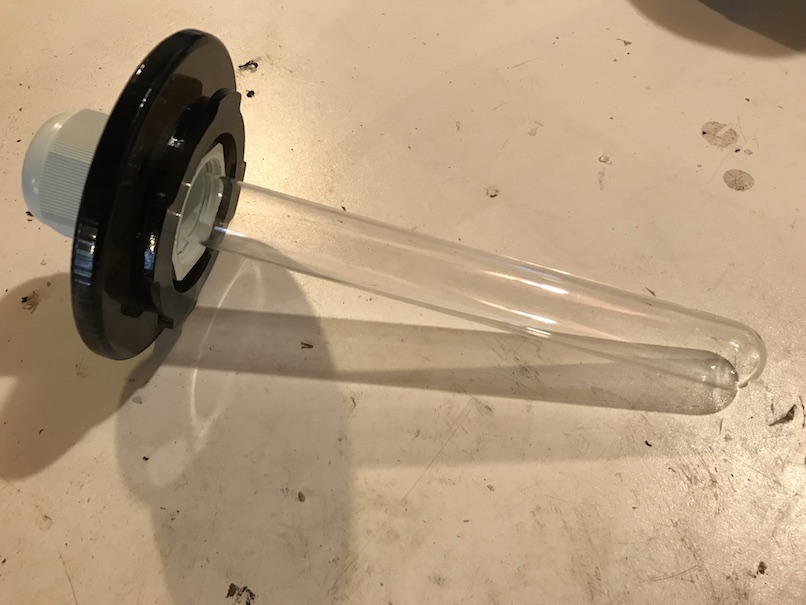
This is the closest I could find to a glass tube: 25mm test tube for $11: www.amazon.com
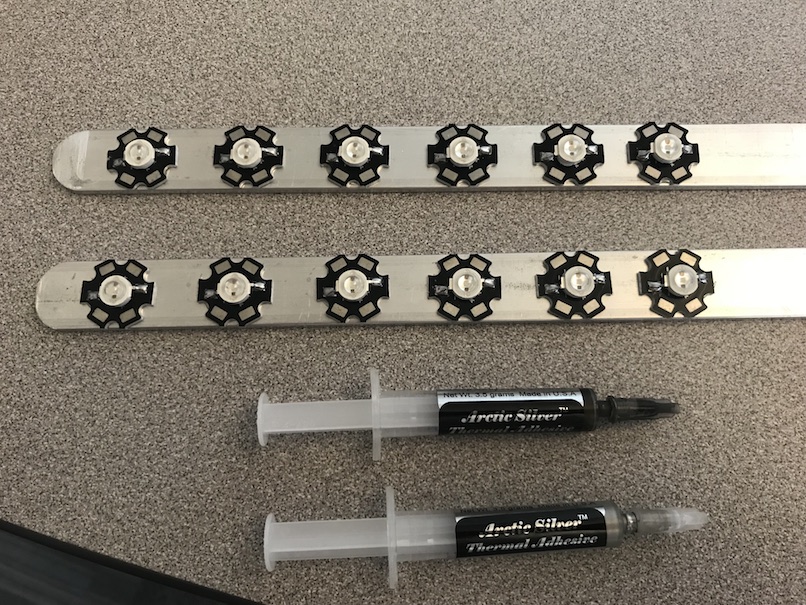
I was unable to find the red/blue grow LEDS on star boards, so had to make my own. I like the star board idea as that will make them easier to attach to a heatsink in this application.
Bare LEDs $15:
Red/Blue LEDs
Star boards $1:
Star boards
(Ended up being $25 for 12 of the above LEDs and boards and they put the LEDs on the boards for me, with shipping included)
Process: Mount the LEDs on a piece of aluminum bar stock with thermal expoy, wire them together and place them inside the heater tube. Seal it up with epoxy or silicone, but I plan to leave the wire end protruding from the top of the reactor for extra safety (I won't submerse it). It will only be 24v DC, but still, I wouldn't trust the tube seal underwater.
This is the Power supply I had planned on using, $6:
LED Driver. But it was far too slow to get here, so I ended up using just a 24v, 1.1a wall wart. Transformer
The test tube is 1", so I'll need a bushing to keep it water tight. One of these will work for both cases, for $2 (ea):
Cable Bushing
They have a British thread on them though, so I won't be able to tap the hole they go in, but others I found were much more expensive.
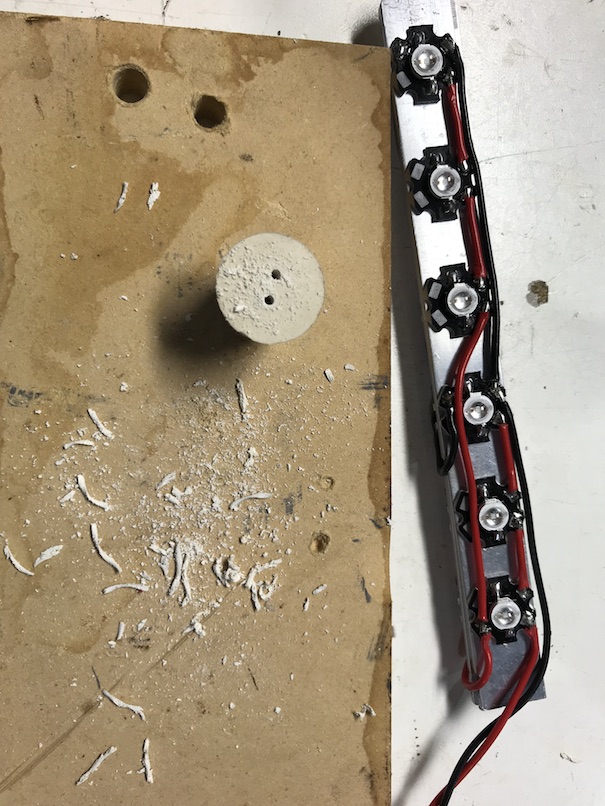
The star boards are 0.65" in dia., so they fit inside the heater tube without having to sand down the edges.
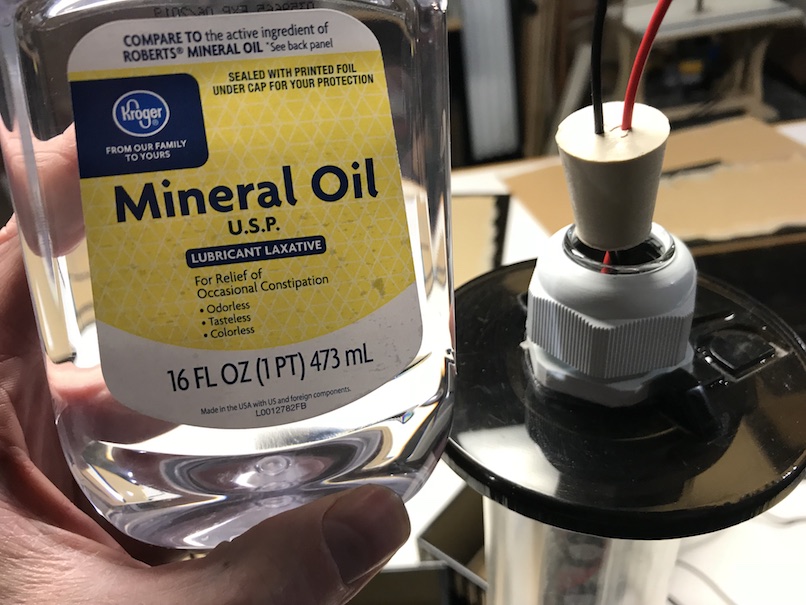
I cut a piece of thin bar stock aluminum just big enough to fit in the tube. I was concerned about dumping 18w of heat out of that tube. The tube will stay at water temp, but the heat does build up inside the tube. I was able to run at 100m without it getting too hot, but ended up going with mineral oil, detailed below.
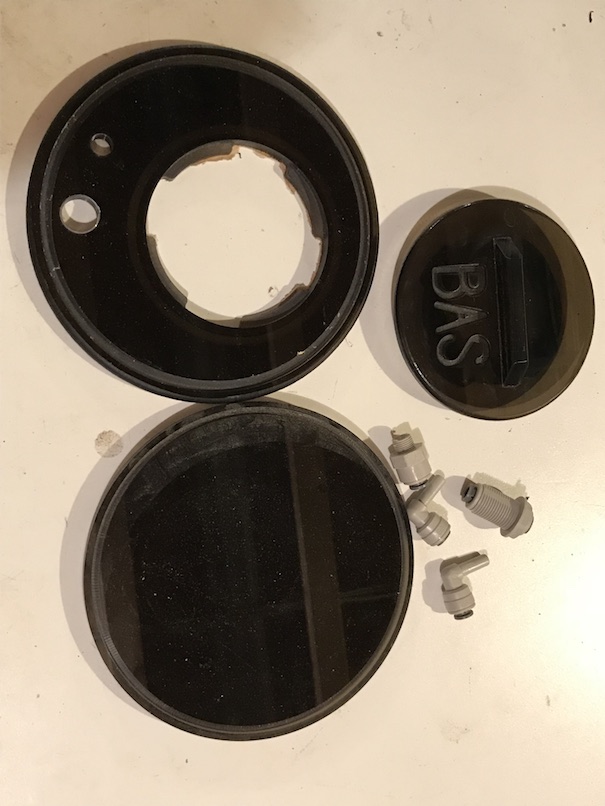
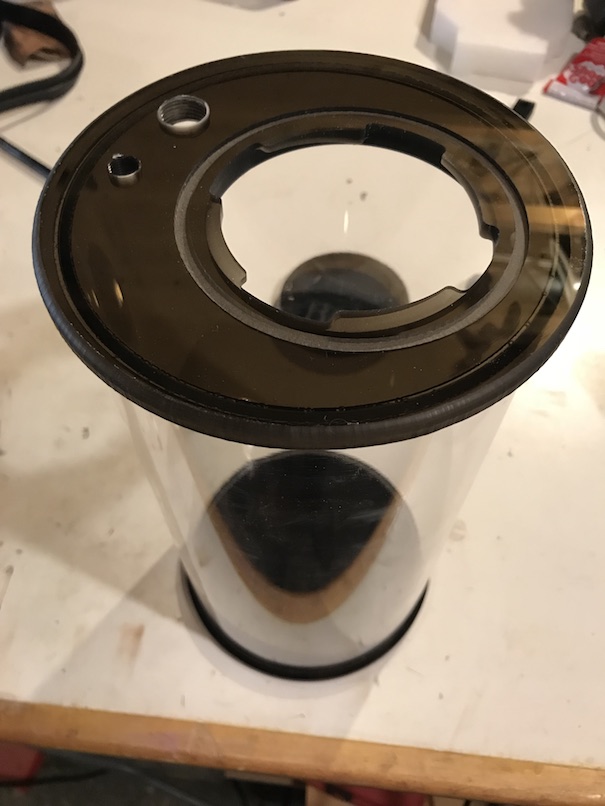
As far as the rest of the setup, I had enough acrylic parts left over that I could steal parts from a Kalk reactor and a Waste Collector, and put together a 6" dia. tube that is 16" tall, with 1/4" plumbing inputs, with a twist-lock lid. Since I'll run the water exit to the sump, the entire chamber will be under less than 1psi pressure, so a twist-lock is fine. The 1/4" plumbing is less than ideal, should be 1/2", but these are the parts I have on hand. I can always drill it out or put in more ports later if desired.
So grand total was $44 plus the aluminum and acrylic, which I already had. If you want to do this yourself, you will need to make the flanges or order a set.
Build process:
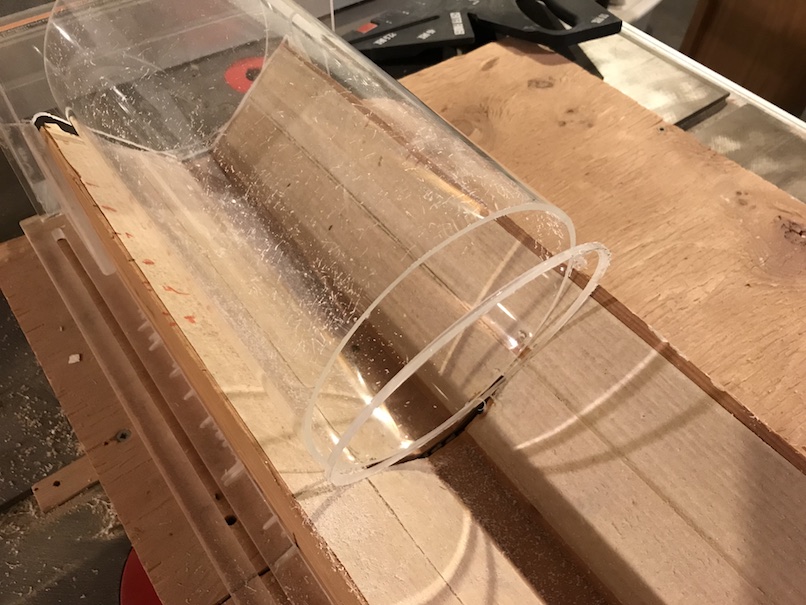
First, trim the 6" tube to length, and remove the end which is malformed from the casting process.
Here are the parts I had on hand. Twist-lock cap and flange set, base, and fittings.
Assembly: I'll be brief here, as it's covered in many other threads, but I put Weldon #4 in the groove, let it sit for a minute, then slowly lower the tube in to the groove and let it dry. Gives a good clean bond, with no slop.
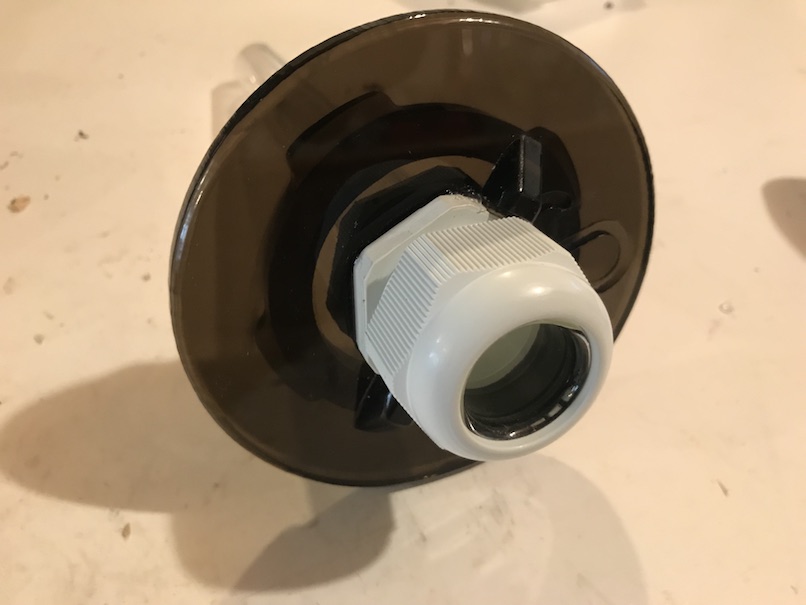
Fly cutter that I used to open up a hole large enough for the 1" cable grommet:
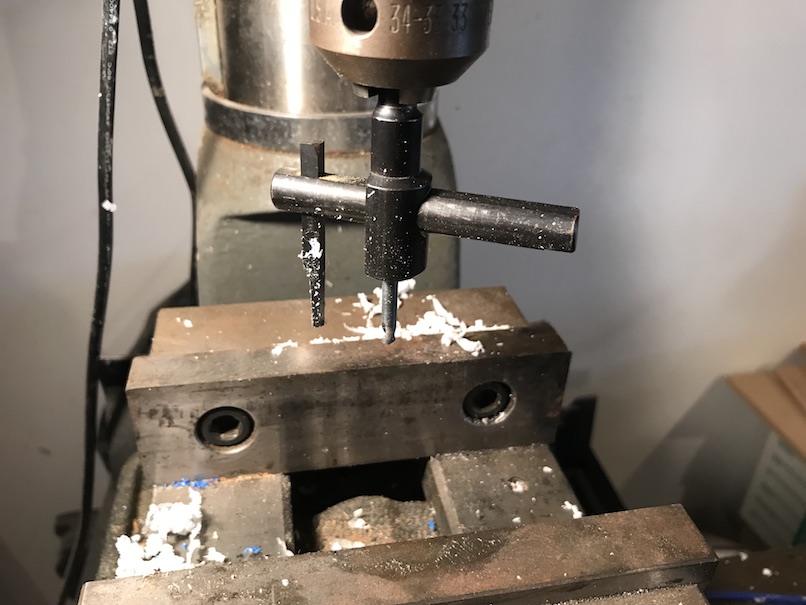
I was able to just barely get the nut to fit and bite, but I sealed it with silicon tank sealer and used the nut to help mechanically clamp it together.
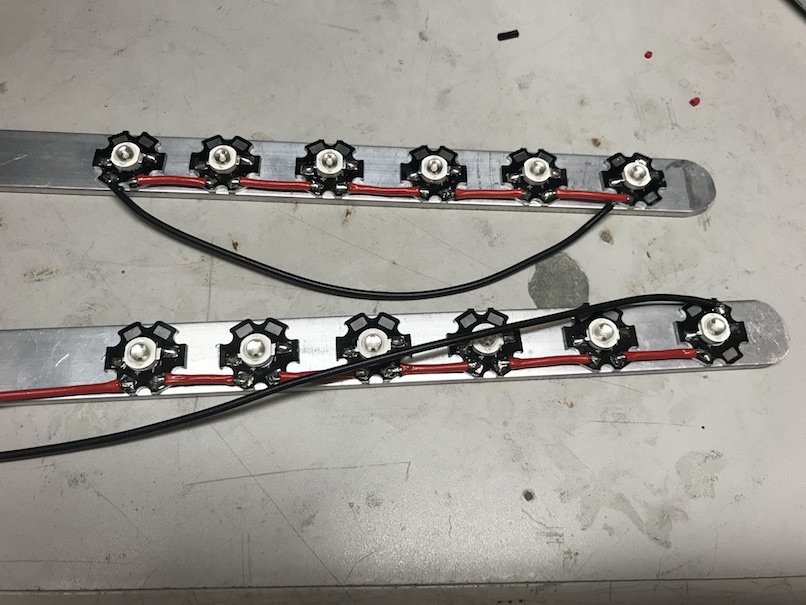
Got the LEDs glued on a piece of 1/8" aluminum that I had. Used Arctic Silver epoxy to bond them, then hooked them up to a bench DC source to test.
Tests on 6 in series:
100ma = 42.1vi
150ma = 43.7v
200ma = 44.5v
250ma = 45.7v
300ma = 46.6v
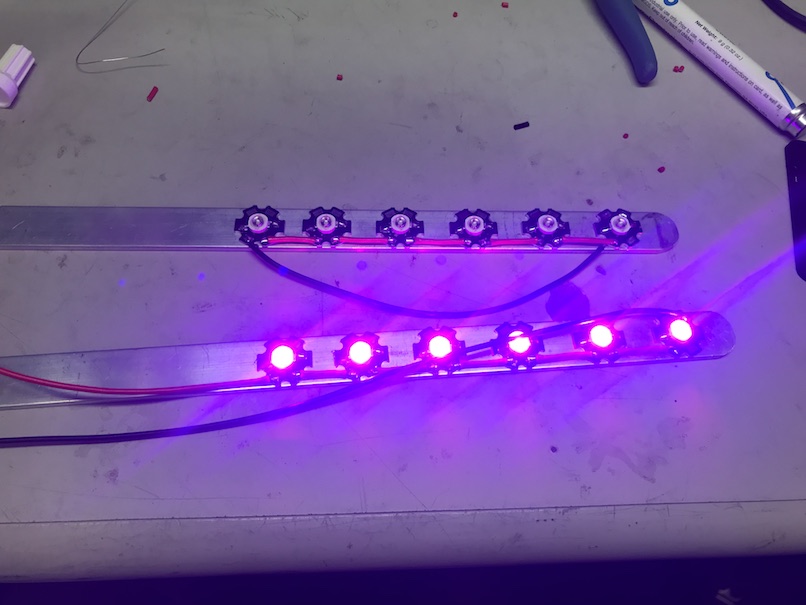
I re-wired the LEDs in to four strings of three LEDs each, and ran them in parallel to the PWM box.
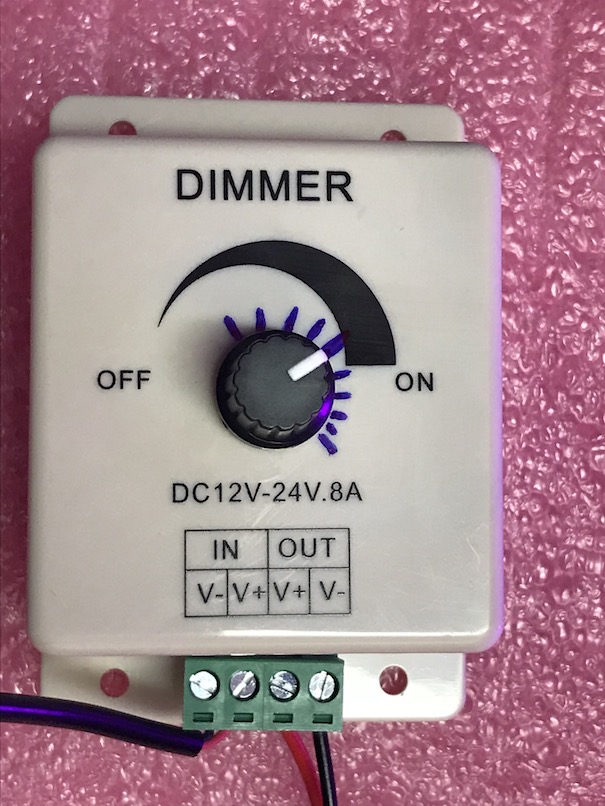
I ran the power through a Multi Meter and marked off 100ma increments on the PWM module. This power supply will only do 1.1A max, so I can't quite get to full power at 300ma * 4, but close enough. I only intend to run them at 1/2 power or less anyway. I'm not confident I can properly cool them at full power, and they should last forever at 1/2 power.
Dimmer ($6): www.toplightled.com
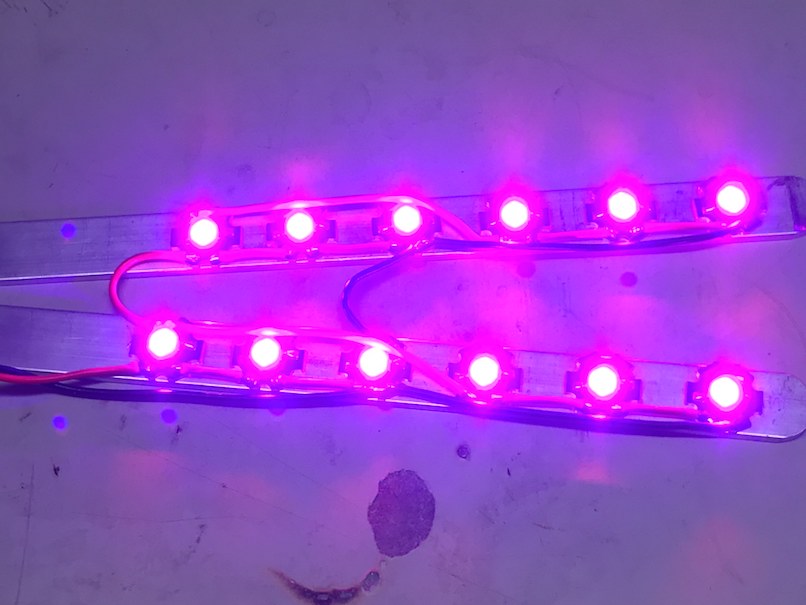
Here they are at about 1/2 brightness.
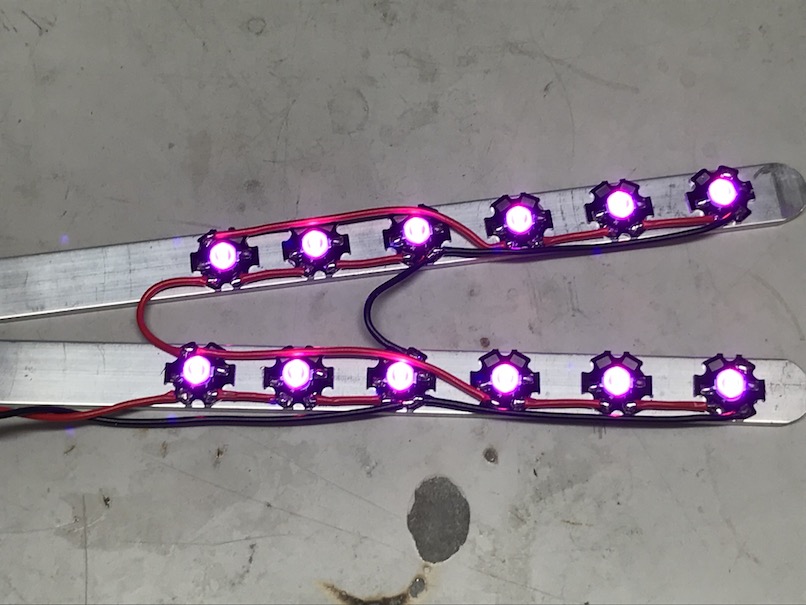
And again at barely on:
This is the cheap AC transformer I got:
I'm not yet confident of the longevity of this setup- That's not an official current limited LED driver, so I might blow it using it this way. And I don't know how it's components will react to the PWM creating current spikes over time either. But I'll update this if I do blow it.
Pulled out the IR camera to check temperature. This is running at approx 500ma total, or 125ma per LED. I let it warm up for 5+ minutes.
I placed scotch tape pieces on the aluminum so I could read an accurate temp. Otherwise, it just reads whatever is reflected off the aluminum.
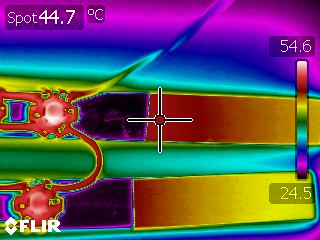

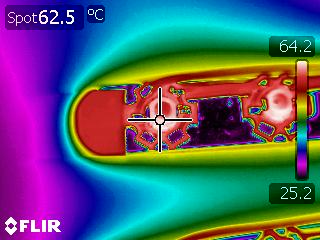
Looking online, I see some derating charts for LEDs like this one from here (www.mouser.com).

That implies that I can run up to about 55c at the LED base-plate without impacting performance.
Got it running last night- Had to sand the aluminum a little to get the LEDs to slide in to the tube. Set it to 300ma and was reading about 110F on the end of the heatsink this morning, after about 10 hours of running. So a little warm, but not too bad.
I wrapped it with mylar to block the light. Had to steal a space blanking from the camping stuff, couldn't find any other reasonable source. Works well for blocking the light, very little leaks though.
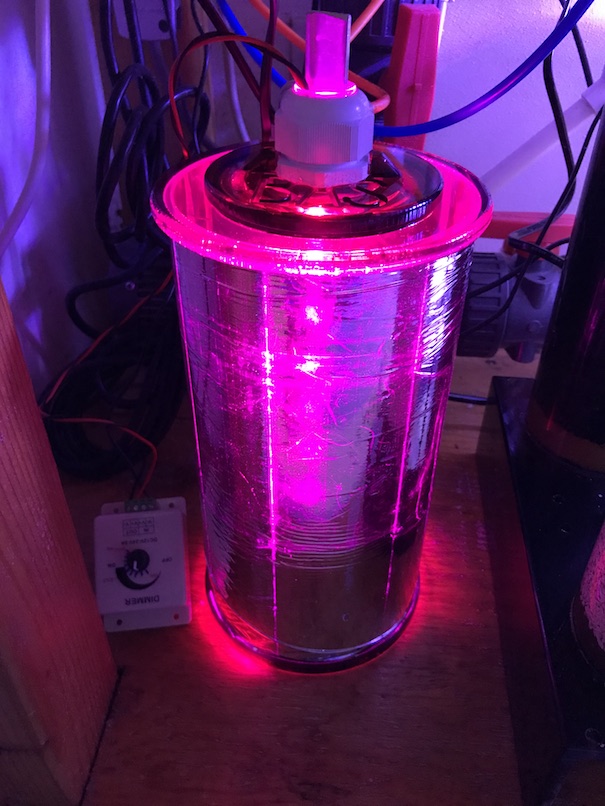
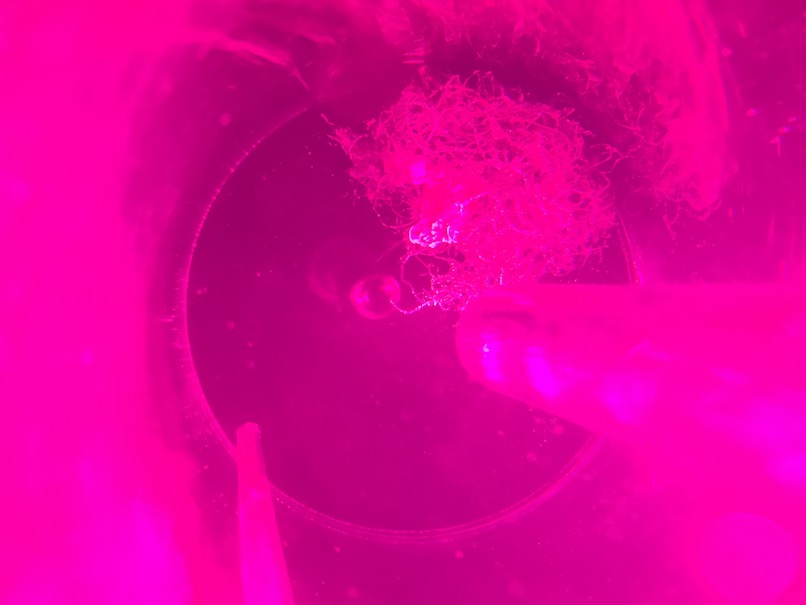
Put in a mostly dead ball of chaeto, will see if can grow at all. I love how I can look down through the tinted top and see what's going on inside.
I'd recommend going with 1/2" fittings for better flow, I'm at about 250ml/min flow rate.
I ran this for several weeks as shown, then I cut down the aluminum and did a mineral oil immersion setup. I don't want to fry the LEDs, and I'm thinking it will get too hot if I go up any higher. I expect it to transfer heat to the glass tube a lot better, so I should be able to run it at full power if I want to nuke the algae.
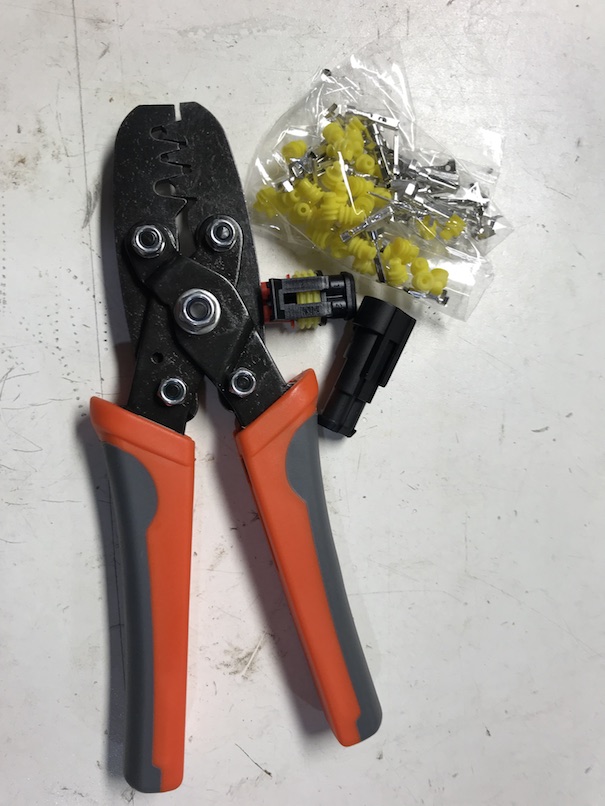
I also installed some waterproof connectors I found:www.amazon.com along with the crimper:www.amazon.com
|